This guide will take you through the steps on how to process a wiCode transaction and view the report "transaction list" for all wiCode orders processed for a selected date range.
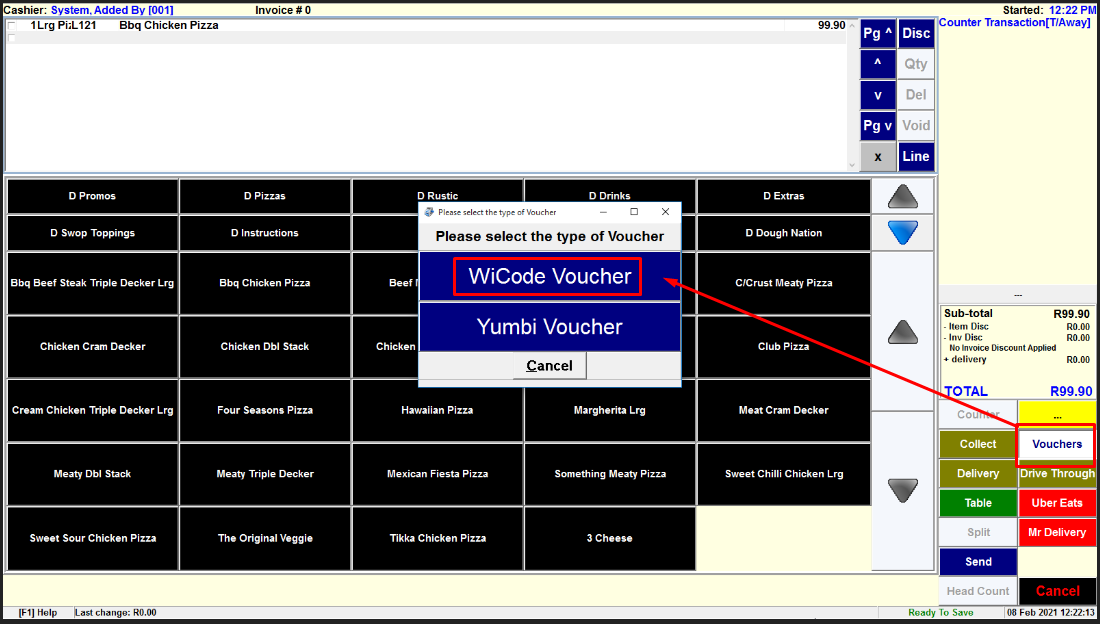
Once you have processed the customer's order, you will need to click the ellipse (...) on the right-hand side twice / until you see the option for Vouchers.
From here you need to select wiCode Voucher.
Once you have selected wiCode Voucher, the wiCode redemption screen will pop-up, here you will need to type/scan the code presented by the customer.
Do not add any spaces in the wiCode field, please see the below examples.
❌ Incorrect
✔️ Correct
Once you have typed in the code correctly, you will need to select Redeem next to the code, if the code is valid, you will receive the below response.
(If a code is invalid the transaction will be unsuccessful)
Once you have received a successful response from wiCode you can click on Add to add the voucher payment to the invoice. Once added you will notice on the left-hand side that the wiCode amount will be deducted from the Invoice total, if there is still an outstanding amount it will still need to be captured.
Click on Done when you are ready to complete the transaction.
When completing the payment, you will notice that the wiCode transaction will appear under the other payments section.
To now view the list of wiCode transactions for the day you can view the report by clicking on List on the top navigation bar of invoicing.
From the drop-down, go to wiCode Reports.
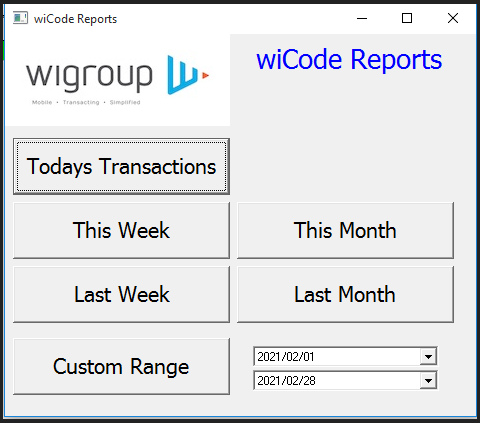
You will then need to select the date range for the report; (Below is an example of the available options)
The report will then display all the relavant information as per below example.


